How to order 3D visualization of your project?
January 31, 2026
Learn how to order 3D visualization for your architectural or design project step-by-step. Get a clear workflow, know what documents to prepare, and see how a professional studio like Provisual.pro Studio creates photorealistic renders. Start your project today.
Introduction: The Essential Guide to 3D Visualization Services
If you’re searching for “how to order 3D visualization,” you’re in the right place. This definitive guide breaks down the entire process of commissioning high-quality 3D architectural renders and animations. Whether you’re an architect, developer, or designer, understanding this workflow ensures you get stunning visuals that meet your deadlines and budget, perfectly communicating your vision to clients and stakeholders.
Why Quality 3D Visualization Matters for Your Project
Before we dive into the “how,” let’s understand the “why.” Professional 3D visualization is a critical tool for:
- Winning Client Approvals: Photorealistic images help clients visualize the final result, reducing uncertainty and speeding up decision-making.
- Identifying Design Flaws: Spot potential issues in scale, lighting, or material clashes before construction begins, saving significant time and money.
- Powerful Marketing & Pre-Sales: Create compelling materials for brochures, websites, and investor presentations to generate interest and secure funding early.
The Step-by-Step Process: How to Order Your 3D Visualization
Following a structured process is key to a successful outcome. Here is the exact workflow professional studios like Provisual.pro Studio use.
Step 1: Define Your Project Vision (The Initial Brief)
The first step in ordering 3D visualization is to prepare a clear, comprehensive brief. This is the most critical phase for aligning expectations. You should provide:
- Project Scope: Location and type of building (link to Google Maps).
- Visual Requirements:
- Number of final images or animation length.
- For exteriors: Specify views (human-height, aerial, specific angles).
- For interiors: List all rooms to be rendered (e.g., lobby, master suite, open-plan office).
- Atmosphere & Style: Desired time of day (day, night, sunset) and overall mood. Pro Tip: Gather reference images or create a mood board (Pinterest is great for this). This gives the 3D artists a direct visual guide to your aesthetic goals.
Step 2: Prepare & Submit Your Technical Documents
Providing a complete set of drawings in standard formats (PDF or DWG) is the key to modeling efficiency and accuracy. For ease of understanding, we have divided the requirements into two groups: exterior and interior.
Group 1: Documents for EXTERIOR and Environment Modeling
| Required Document | Why It Is Needed |
| Site Plan / Master Plan | To accurately position the building within the context of the plot, roads, neighboring structures, and terrain. |
| Architectural Sections | To correctly represent height levels, ground elevation changes, foundation, and roof structure. |
| Elevations | For detailed modeling of the building’s exterior: placement of windows, doors, finishing materials, and decorative elements. |
| Elevation Unfoldings | For precise texturing and material representation on all visible planes. |
| Landscaping Plan / Site Development Plan | To model the surrounding landscape: pathways, paved areas, site furnishings, and placement of plants and trees. |
| Schematic 3D Model (if available) | An existing geometry base (in 3ds Max, SketchUp, Revit) will accelerate work on the exterior. |
Group 2: Documents for INTERIOR Modeling
| Required Document | Why It Is Needed |
| Floor Plans | For accurate modeling of spatial layout, placement of walls, door/window openings, plumbing fixtures, and furniture. |
| Reflected Ceiling Plans | To represent complex ceiling structures, cornices, built-in lighting, and fixture layout. |
| Interior Sections | To correctly depict room heights, niches, arches, stairs, and multi-level structures inside. |
| Finishing Materials Schedule | A critically important document. A list specifying the exact materials for each surface type (flooring, wall paint, cladding, fabrics) for photorealistic texturing. |
| Drawings/Sketches of Custom Furniture or Elements | For accurate modeling of unique interior items, stairs, fireplaces, built-in cabinets. |
| Furniture and Lighting Layout Plan | To understand the design concept and correctly place objects within the scene. |
| 3D Interior Model (if available) | An existing model (3ds Max, SketchUp) serves as an ideal foundation for detailing and rendering. |
Format and Recommendations:
- Preferred Formats: PDF (for viewing and measurements) and DWG (for direct geometry import).
- Important: All drawings must have dimensions, scale, and be the latest version. Please indicate if any changes were made during the project’s development.
- Advice: Collect reference images (photos) of desired materials, atmosphere, and style—this will further clarify the task for the 3D artist.
Step 3: The Professional 3D Visualization Workflow
Once the brief and documents are received, a studio like PROVISUAL follows a proven pipeline to ensure quality:
- Modeling: Artists create a precise digital 3D model based on your drawings.
- Texturing & Lighting: Materials from your schedule are applied, and lighting is set up according to your specified time of day, creating mood and depth.
- White renders for choosing camera angle.
- Rendering: Using advanced engines like Corona Renderer or V-Ray, the software calculates the final, photorealistic image. This is a computationally intensive process.
- Post-Processing: The rendered image is refined in Photoshop. Artists adjust colors, contrast, add people, vegetation, and enhance atmospherics to achieve the final look.
- Review & Revisions: You receive watermarked previews for feedback. Clear, consolidated notes at this stage ensure the final deliverables match your vision.
- Final Delivery: You receive high-resolution images or animations in the required formats, ready for print or digital use.
What Can You Order from Provisual.pro Studio?
Understanding the services available helps you scope your project correctly.
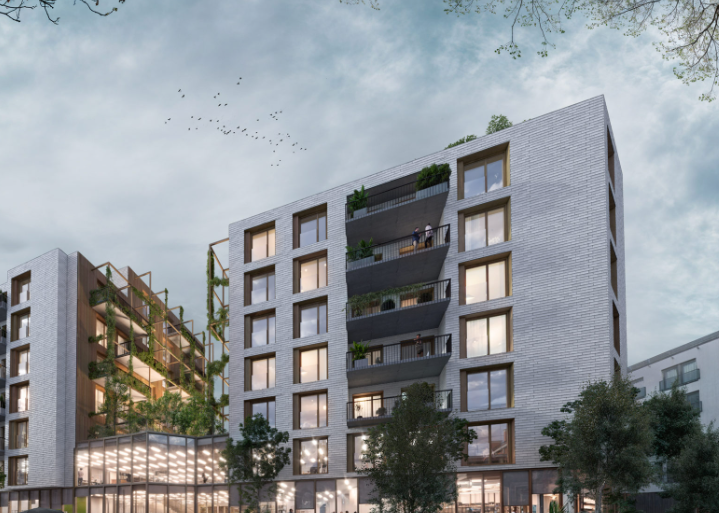
- Exterior Renderings: Showcase your building from any angle, from street-level views to breathtaking aerial panoramas.
- Interior Renderings: Bring indoor spaces to life with realistic lighting, textures, and furnishings.
- Architectural Animations & Walkthroughs: Create dynamic video tours that offer an immersive experience of the space.
- Virtual Reality (VR) Tours: Allow clients to explore the design in a fully immersive 3D environment using VR headsets.
- Floor Plan & Site Plan Renderings: Create polished, easy-to-understand 2D visualizations of plans for presentations and marketing.
Key Factors That Influence the Cost of 3D Visualization
When ordering, it’s helpful to know what affects the price:
- Project Complexity: A detailed custom home differs from a large-scale mixed-use development.
- Number of Views/Outputs: More images or longer animations increase cost.
- The standard number of revisions is no more than 3.
- Turnaround Time: Urgent projects often incur a rush fee.
How to Choose the Right 3D Visualization Studio
Not all studios are the same. Look for:
- A Strong, Relevant Portfolio: Ensure their style matches what you envision.
- Clear Communication: They should ask detailed questions about your brief.
- Transparent Pricing & Process: No hidden fees and a clear timeline.
- Technical Expertise: Use of industry-standard software and hardware.
Conclusion: Your Vision, Perfectly Visualized
Knowing how to order 3D visualization empowers you to commission a critical asset for your project’s success. By defining your vision, preparing thorough documents, and partnering with a professional studio like Provisual.pro Studio, you transform abstract ideas into compelling visual stories. This investment not only refines your design but becomes your most powerful tool for communication, approval, and marketing. We offer competitive prices for 3D architectural visualization in the USA.
Ready to start? Prepare your project brief using this guide and contact a professional 3D visualization studio to discuss your vision and get a detailed quote.